Torque Testers
/
Norbar Torque Test Equipment (0.1-25 Nm)
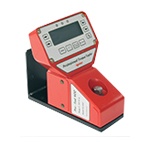
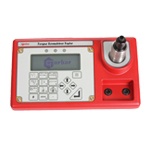
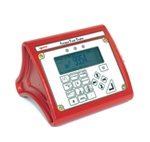
NORBAR TruCheck Plus- Compact and lightweight
- 0.1 - 25 Nm measuring range
- User-friendly, simple and clear menu
- Torque measurement accuracy is ± 1%
- 4 digit and big led display (Format: 00,00)
- Supplied with a traceable calibration certificate
- Creating document with computer free software
- There are three torque units: N·m, lbf·ft and lbf·in.
- Ideal for torque screwdrivers and small wrenches
- Service, spare parts, calibration services include.

 When putting a torque tester into an environment where people are not calibration specialists, concerns can arise with regards to incorrect selections being made and therefore the potential of incorrect tool setting and consequently joint failure.
These new TruCheck Models have been designed to calibrate Torque Screwdrivers and small Torque Wrenches up to 25 N·m.
| Model |
Test Range | Accuracy | Driver Type |
Display | Sizes | Shipping Weight |
| # | Nm | Inch | ** | mm | Kg | |
| 43250 | 0.1 - 3.0 | ±1% | ¼" vertical hexagon (male) | 4 digit LED | 64 x 175 x 72 | 2.6 |
| 43251 | 1 - 10 | ±1% | ¼" vertical hexagon (male) | 4 digit LED | 64 x 175 x 72 | 2.6 |
| 43253 | 1 - 25 | ±1% | ¼" horizontal hexagon (male) | 4 digit LED | 64 x 175 x 72 | 2.6 |
MODE Button
1) Track Mode (‘trAC‘ is displayed). Display follows torque applied
2) Click Mode (‘CLIC‘ is displayed). Display shows first peak of torque applied. Serial data output of peak torque is automatically transmitted. Display automatically resets after 3 seconds. For use with ‘click’ type torque wrenches.
3) Dial Mode (‘dIAL‘ is displayed). Display shows peak of torque applied. Press RESET to clear the display.
For use with ‘dial’ and ‘electronic’ type torque wrenches.
Press UNIT to change units of measurement.
RESET Button
Press RESET to reset display in Dial mode.
Serial data output of peak torque is also transmitted.
Press RESET to transmit serial data in Track mode.
LIMIT Button
1. Press LIMIT to enter target torque setting.
Display flashes between ‘SEt’ and the target torque setting.
- Press MODE to increase target setting. Hold to increase speed of change.
- Press UNIT to decrease target setting. Hold to increase speed of change.

2. Press LIMIT to enter ± percentage tolerance setting from 1 to 10%. Enter ‘0’ for no limits.
‘%’ and the ± percentage tolerance setting is displayed constantly.
- Press MODE to increase ± percentage tolerance setting.
- Press UNIT to decrease ± percentage tolerance setting.
3. Press LIMIT to finish. Display shows ‘FIN’ for 1 second.
 All equipment is shipped with the factory calibration certificate.
Calibration services in Iran are carried out by the Parla Tech.
Delivery Includes
- TruCheck Plus test equipment
- Electric adapter
- Operation manual
- RS-232 data cable
- Shipped in protective special bag
-
 Bolt Torque Equipment
-

 Hydraulic Bolting Tools
-

 Hydraulic Bolt Tensioner Tools
-

 Pneumatic Bolting Tools
-

 Electrical Bolting Tools
-

 Hand torque wrenches
-

 Hand torque multipliers
-

 Impact wrench
-

 Impact Sockets and Accessories
-
 Hydraulic Cylinders
-
 Hydraulic - Mechanical Tools
-
 Machine Condition Monitoring
-
 Portable Machine Equipment
-
 Boiler Maintenance
-
 Valve Grinding & Test Machines
-
 Material Handling and Lifting
-
 Industrial Components
-
 Chemical Technical Products


